Think crunches are the best way to build a strong core? Think again. The dead bug exercise is a hidden gem among core movements—simple-looking yet surprisingly effective. It’s a favorite of physical therapists and strength coaches alike for one reason: it targets the deep core muscles that stabilize your spine and pelvis, all without putting strain on your neck or lower back.
But here’s the kicker: the classic dead bug is just the beginning. Want to take your core training to the next level? These variations not only challenge coordination and control but also add spice to your workouts. Whether you’re a beginner or a seasoned athlete, these tweaks can reshape your routine.
What Can Happen After 30 Days of Dead Bug Exercise Variations
| Time Frame | Results & Benefits |
|---|---|
| Week 1 | – Improved core engagement and body awareness. |
| – Some initial shakiness or muscle fatigue as the stabilizer muscles adapt. | |
| Week 2 | – Noticeable improvement in stability, especially in the lower back and pelvic area. |
| – Increased control in executing the movement with less shaking or discomfort. | |
| Week 3 | – Strengthened deep core muscles like the transverse abdominis and multifidus. |
| – Enhanced spinal alignment, contributing to better posture throughout daily activities. | |
| Week 4 | – Improved coordination and balance in dynamic movements. |
| – Significant reduction in lower back pain or discomfort for those with previous issues. | |
| – Increased core strength and endurance, making more advanced variations achievable. |
Do’s and Don’ts of Dead Bug Exercise Variations
| Do’s | Don’ts |
|---|---|
| Do maintain controlled movements to avoid jerking motions. | Don’t rush the exercise—quality over speed. |
| Do keep your lower back pressed into the floor for optimal core engagement. | Don’t allow your lower back to arch off the floor. |
| Do engage your core muscles before extending your arms or legs. | Don’t hold your breath during the exercise. |
| Do start with basic variations if you’re a beginner. | Don’t perform exercises beyond your ability too soon. |
| Do add variations gradually as your core strength improves. | Don’t use heavy resistance early in your routine. |
| Do focus on form and control to ensure maximum benefit. | Don’t let your arms or legs drop too low without control. |
Why the Dead Bug Deserves a Spot in Every Workout
Before diving into variations, let’s quickly understand why the dead bug exercise is a powerhouse for your core:
- Targets the deep stabilizers like the transverse abdominis and multifidus.
- Promotes spinal alignment and posture.
- Enhances core control without spinal flexion (unlike crunches).
- Ideal for rehabilitation, posture correction, and athletic performance.
Did You Know?
The dead bug gets its quirky name from the position you hold—lying on your back with arms and legs in the air—much like a flipped-over insect. But don’t let the name fool you; it’s far from lifeless.
1. Dead Bug with Stability Ball
What it is: Place a stability ball between your knees and hands while performing the dead bug motion.
Why it works: This version intensifies the core contraction by engaging the adductors (inner thighs) and upper body to maintain ball contact.
Unique Benefit: It introduces isometric tension throughout the movement, enhancing mind-muscle connection.
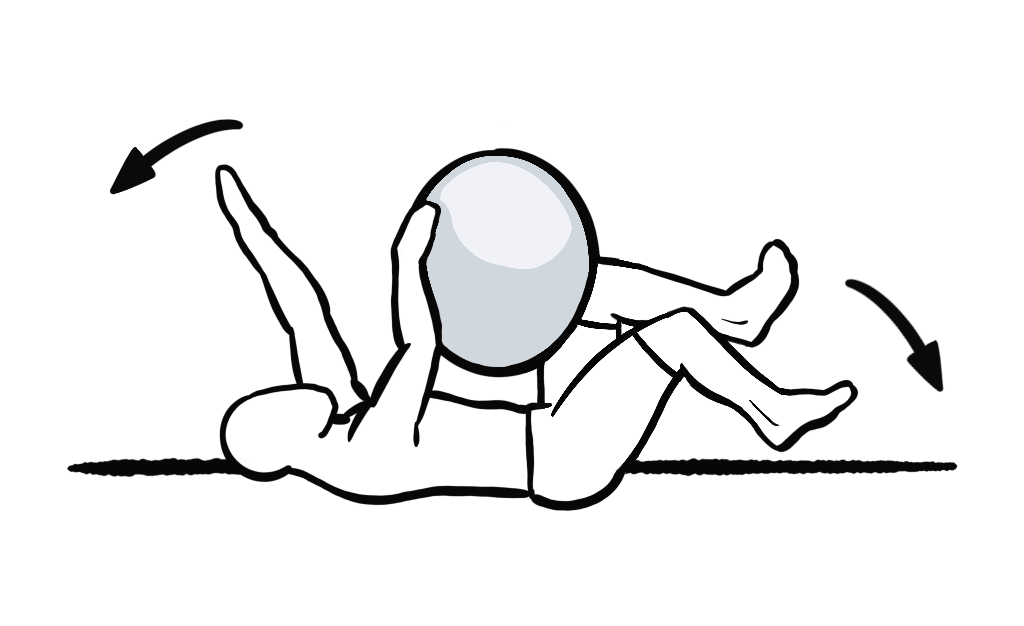
Instructions:
- Start Position: Lie on your back with your arms straight up toward the ceiling and a stability ball between your hands and knees.
- Engage Core: Tighten your core, press your lower back into the floor, and ensure your shoulders and hips are in a neutral position.
- Movement: Slowly extend your right leg and lower your left arm toward the floor, keeping the ball steady between your hands and knees.
- Return: Bring your leg and arm back to the starting position while maintaining control of the ball.
- Reps: Alternate between sides for desired reps or time.
Tip: Keep the ball in place by squeezing your hands and knees together. This will engage your core more effectively.
2. Dead Bug with Resistance Band
What it is: Anchor a resistance band and hold the handles in both hands while performing the exercise.
Why it works: The band adds tension, especially on the arms, and mimics real-life resistance your core must fight.
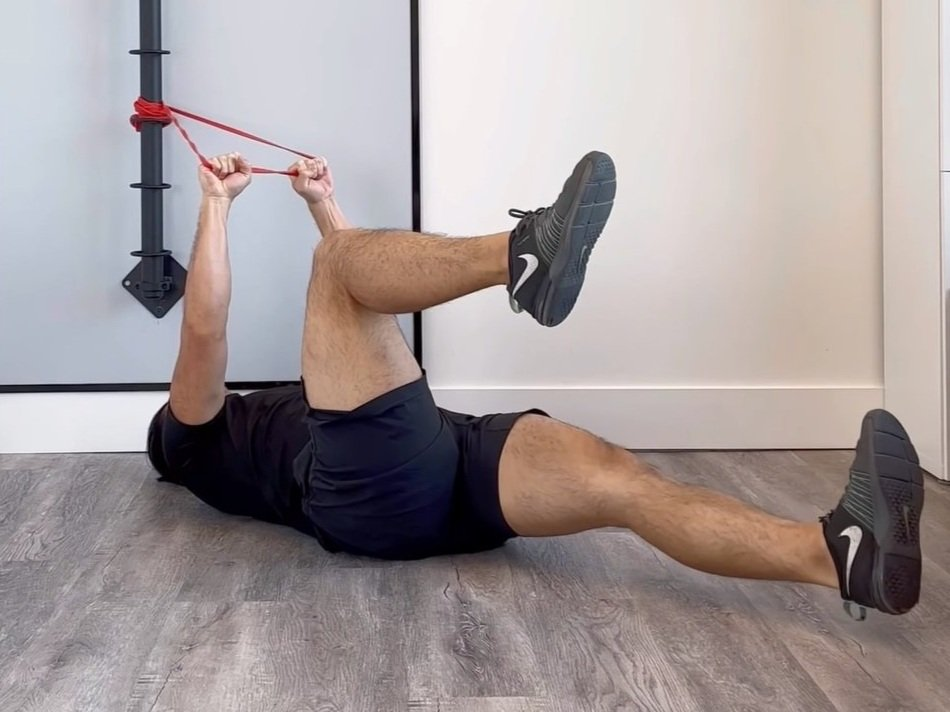
Instructions:
- Start Position: Anchor the resistance band around a fixed object and hold the handles with both hands. Lie on your back with your arms extended toward the ceiling and legs bent at 90 degrees.
- Engage Core: Tighten your core and flatten your lower back against the floor.
- Movement: Extend your right leg and lower your left arm toward the floor, resisting the tension of the band.
- Return: Pull the band back to the starting position as you bring your arm and leg back together.
- Reps: Alternate between sides.
Tip: Focus on resisting the band’s pull to increase time under tension and activate the core muscles.
Common Myth Busted:
Some believe resistance bands are only for beginners. In reality, they can be progressive overload tools, especially for bodyweight-based exercises like dead bugs.
3. Dead Bug with Leg Press
What it is: Perform the leg movement against light resistance using a mini loop band around your feet.
Why it works: Forces your hip flexors and quads to stabilize, enhancing lower-body engagement.
Best for: Athletes who want to bridge core and leg coordination, such as runners or cyclists.
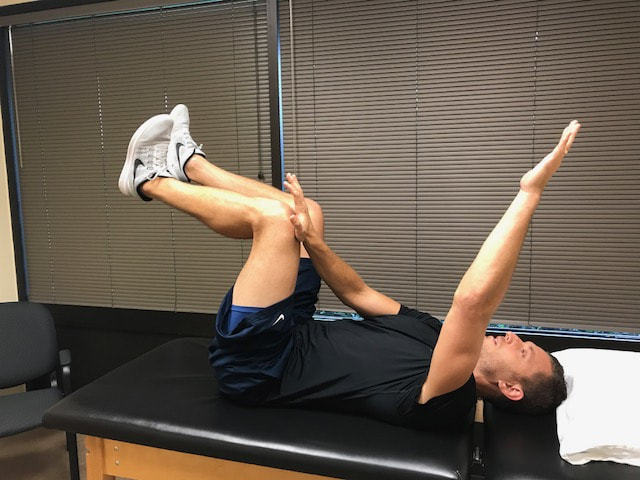
Instructions:
- Start Position: Lie on your back and place a mini loop resistance band around your feet. Lift your legs into a tabletop position (hips and knees bent at 90 degrees).
- Engage Core: Engage your core and press your lower back into the floor.
- Movement: Slowly extend one leg straight out while maintaining tension on the resistance band.
- Return: Bring your leg back to the tabletop position while keeping your core engaged and without letting your lower back arch.
- Reps: Alternate legs, or perform reps on one leg at a time.
Tip: Maintain steady control over the band, ensuring you don’t rush the movement.
4. Wall Press Dead Bug
What it is: Lie near a wall, and press your palms into it while performing the leg movement of the dead bug.
Why it works: Encourages anterior core engagement by adding resistance in the upper body, helping to prevent rib flare.
Pro tip: Great for those working on posture correction and reducing anterior pelvic tilt.
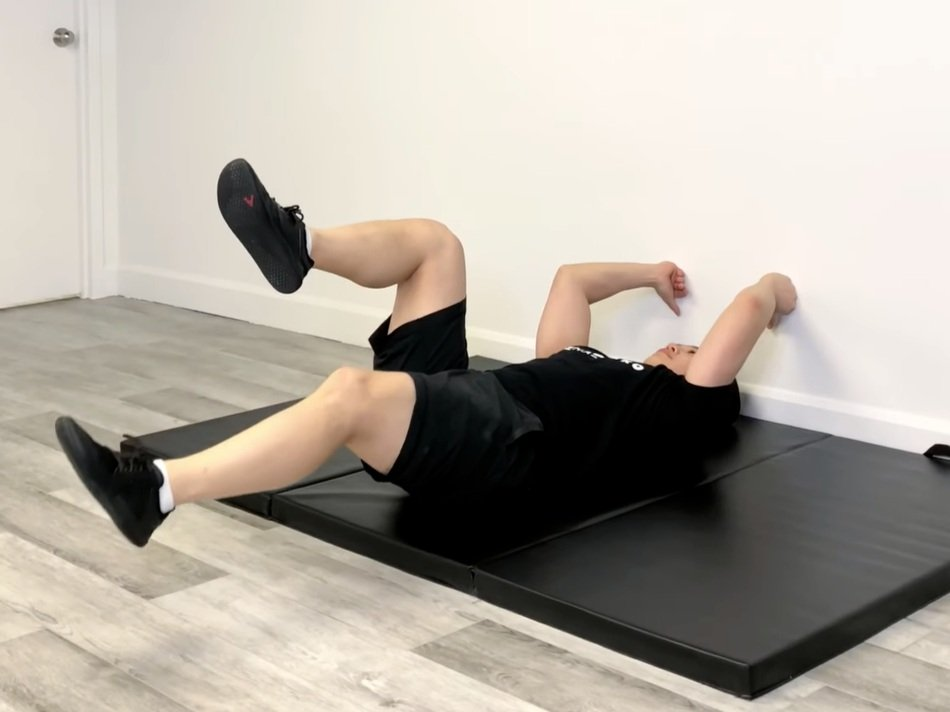
Instructions:
- Start Position: Lie on your back near a wall and press your palms into the wall at shoulder height, ensuring your body is in a straight line.
- Engage Core: Engage your core and flatten your lower back against the floor.
- Movement: Slowly extend your right leg and left arm while maintaining pressure on the wall with your hands.
- Return: Bring your arm and leg back to the starting position, keeping your palms pressing into the wall the whole time.
- Reps: Alternate between sides.
Tip: Focus on keeping your core tight and maintaining consistent pressure on the wall to ensure full engagement.
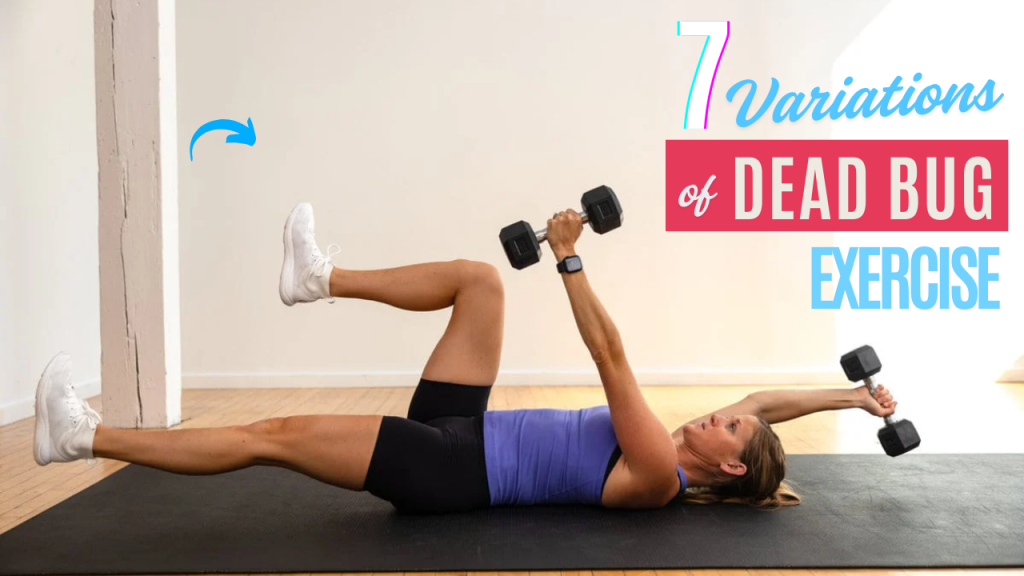
5. Dead Bug with Dumbbells
What it is: Hold light dumbbells (2–5 lbs) in your hands during the classic dead bug movement.
Why it works: Engages the shoulders, increases load on the core, and demands greater control.
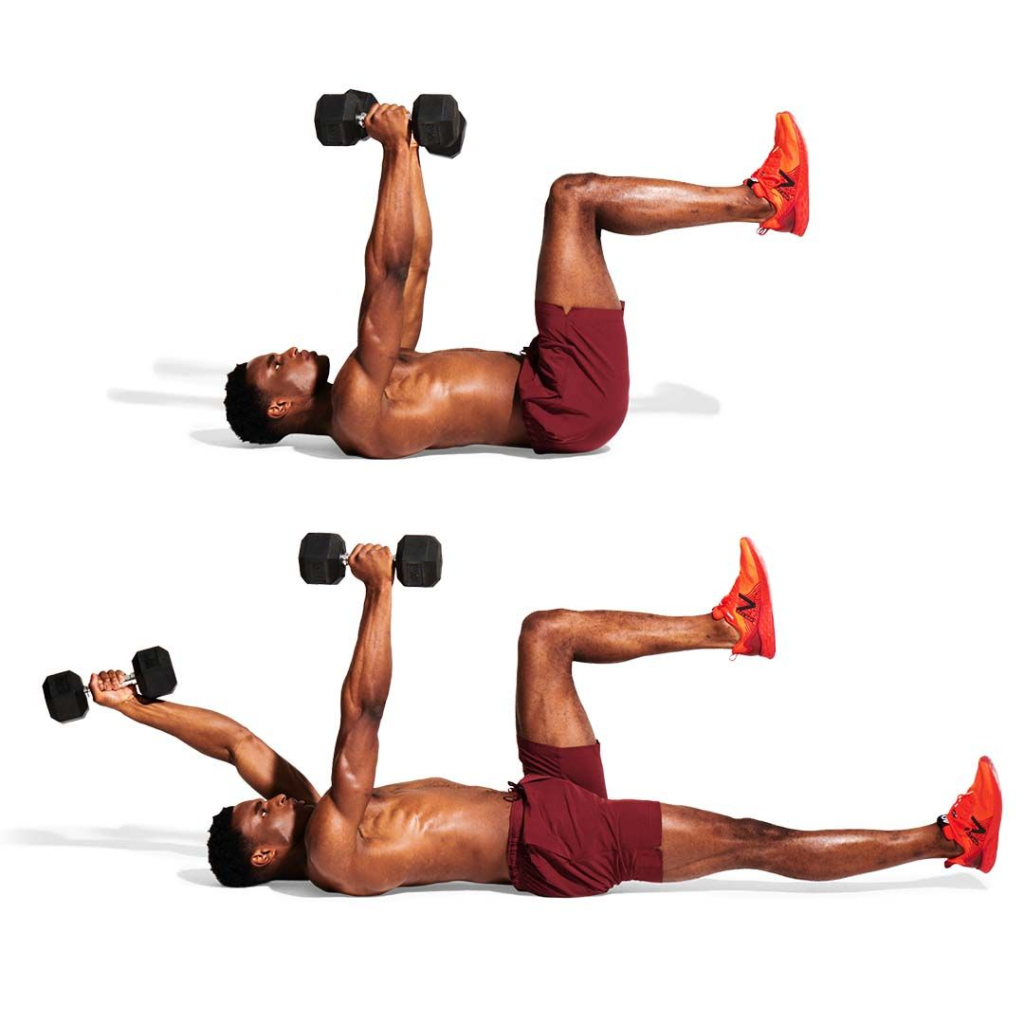
Instructions:
- Start Position: Lie on your back and hold a dumbbell (light weight) in each hand. Your arms should be extended toward the ceiling, and your knees bent at 90 degrees.
- Engage Core: Tighten your core and press your lower back into the floor.
- Movement: Slowly lower your left arm with the dumbbell and extend your right leg straight out, keeping your core engaged.
- Return: Bring your arm and leg back to the starting position while maintaining control over the dumbbells.
- Reps: Alternate between sides.
Tip: Keep the dumbbells steady in your hands without swinging them, focusing on controlled motion.
Interesting Fact:
When dumbbells are introduced, the movement mimics crawling—a primitive movement pattern deeply connected to neurological development in infants.
6. Tempo Dead Bug
What it is: Slow down each movement to a 3–4 second count both during extension and return.
Why it works: Time under tension amplifies muscular activation and control.
Perfect for: Those focusing on hypertrophy or developing motor control after injury.
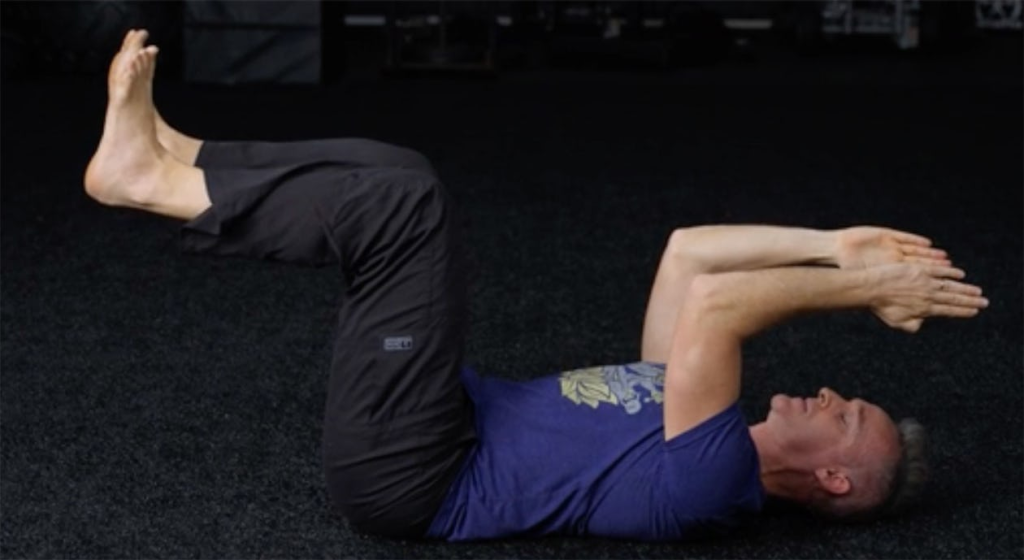
Instructions:
- Start Position: Lie on your back with your arms extended toward the ceiling and your knees bent at 90 degrees.
- Engage Core: Tighten your core and press your lower back into the floor.
- Movement: Slowly extend one arm and the opposite leg, counting 3–4 seconds as you lower them.
- Return: Pause at the bottom for 1–2 seconds, then return to the starting position at a controlled pace.
- Reps: Alternate between sides, keeping the tempo slow and steady.
Tip: The slower you go, the more you increase the time under tension, helping to build strength and control.
7. Dead Bug with Foam Roller
What it is: Balance a foam roller vertically under your spine while performing the dead bug.
Why it works: Challenges stability and body awareness by narrowing your base of support.
Bonus Benefit: Improves proprioception, which is your body’s sense of position and movement.
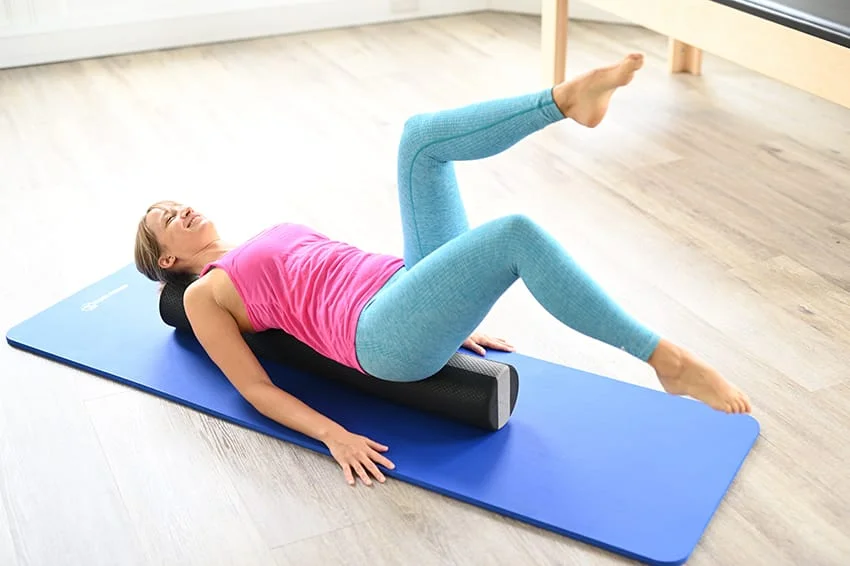
Instructions:
- Start Position: Lie on your back and place a foam roller vertically under your spine, ensuring your hips and shoulders are aligned. Your arms should be extended toward the ceiling, and knees bent at 90 degrees.
- Engage Core: Engage your core to prevent your lower back from arching, pressing it into the floor.
- Movement: Slowly extend one arm and the opposite leg while keeping the foam roller steady under your back.
- Return: Bring your arm and leg back to the starting position, ensuring the foam roller remains stable.
- Reps: Alternate between sides.
Tip: This variation helps with proprioception, so focus on maintaining balance while moving.
Final Thoughts: Variation Is the Secret to Core Intelligence
If you’ve ever plateaued in your core training or experienced lower back discomfort from traditional exercises, these dead bug variations can be your answer. They’re not just alternatives—they’re evolutions that retrain your body to move with better control, balance, and resilience.
Fitness Truth:
A shredded six-pack doesn’t always mean a strong core. True core strength is about stability, coordination, and the ability to move efficiently—not just aesthetics.
Next time you hit the mat, skip the crunches. Embrace the bug.
Frequently Asked Questions (FAQs)
Are dead bug exercise variations suitable for beginners?
Yes, many variations of the dead bug are beginner-friendly. Start with the classic version to build foundational control, then gradually introduce simple variations like the wall press or stability ball version as your core strength improves.
Can dead bug exercises help with lower back pain?
Absolutely. The dead bug is often recommended by physical therapists because it activates deep core muscles without placing stress on the lumbar spine. It helps improve posture and spinal stability—key factors in reducing back discomfort.
How often should I do dead bug variations for best results?
You can incorporate dead bug exercises 2–4 times per week depending on your goals. For general core maintenance, twice weekly is sufficient. If you’re working on rehab, posture, or athletic performance, you may benefit from more frequent sessions.
Do I need equipment for dead bug variations?
Not necessarily. While some variations use tools like resistance bands, stability balls, or dumbbells, many can be done using just bodyweight. Equipment-based versions help add variety and intensity, but they’re not essential.
What muscles do dead bug variations target?
Primarily, they target the transverse abdominis, rectus abdominis, obliques, pelvic floor muscles, and spinal stabilizers like the multifidus. Some variations also engage the hip flexors, glutes, adductors, and shoulders.
Is it normal to feel shaky while performing dead bugs?
Yes! Especially in beginners, shaking is a sign your stabilizer muscles are working hard. With consistent practice, this will decrease as your neuromuscular control improves.
Can I do dead bug variations during pregnancy?
In early pregnancy, some dead bug variations (particularly those without added load) may be safe. However, always consult a healthcare provider or prenatal fitness specialist, as core and supine exercises need to be modified in later trimesters.
Why is it called a “dead bug” exercise?
The name comes from the position you assume—lying on your back with arms and legs lifted, resembling an upside-down insect. But unlike a dead bug, you’re engaging muscles with purpose and control!